Programming
- There are two main programming methods supported and tested with the Smart Lights X4:
ESPHome
Arduino
In both scenarios, and if you are using the USB port or the Serial port for programming it, you will first need to enter the board into flashing mode. For that, press and hold the Flash pushbutton while you reset the board (pressing once the Reset pushbutton).
Caution
When flashing the board, make sure its only powered by the USB/Serial port.
ESPHome
ESPHome is a well known platform for programming ESP-based devices with a very little effort. It is configured via YAML files and supports a wide range of functionalities and sensors.
Important
For using ESPHome, and all its funcionalities, you need to have a Home Assistant instance running in the same network as your Smart Lights X4.
The Smart Lights X4 already comes with an embeded version of ESPHome, that would only require an OTA update to get it ready to work in your network:
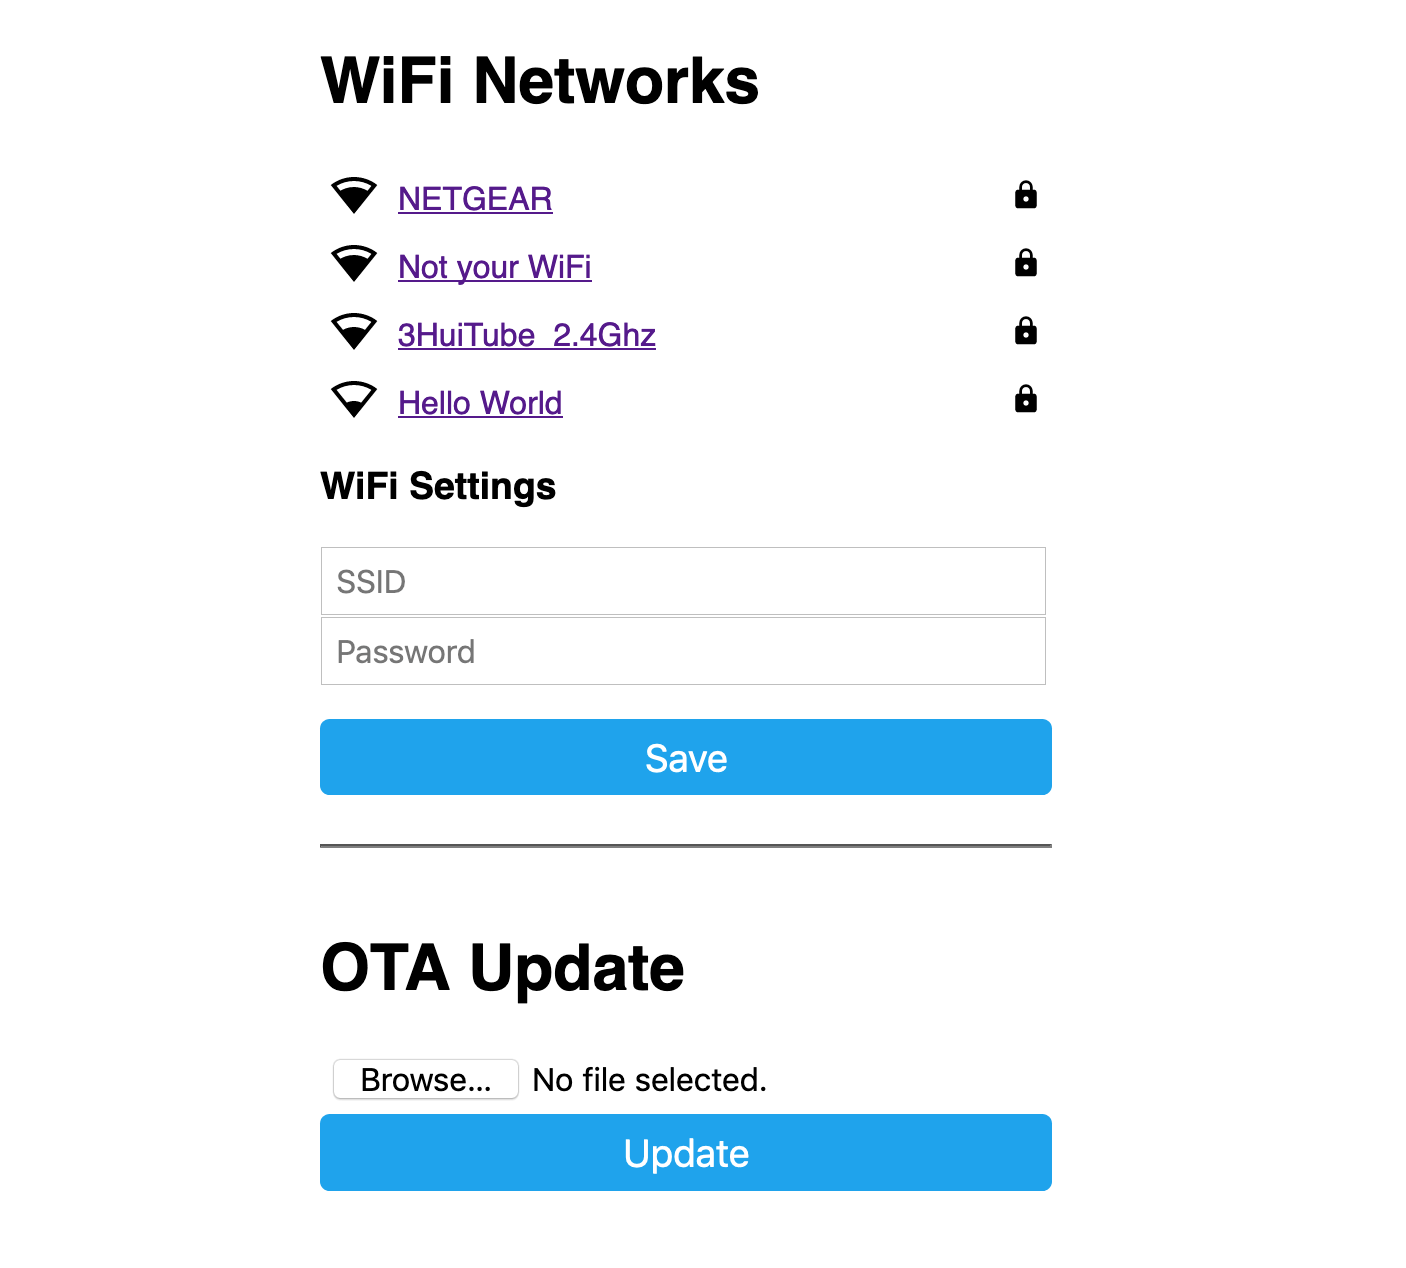
Power the board, and let it run for 1-2 minutes. When the board cannot connect to a WiFi network, it will create a fallback hotspot.
Use a smartphone or tablet and go to the WiFi settings, connect to the recently created Smart-Lights-X4 hotspot with the password smartlights.
Access to the captive portal and open the browser if doesn’t pop up automatically.
Enter your network setttings and press Save.
Now, your ESPHome device is ready to be found by Home Assistant in your network. Add it from the ESPHome section to add and edit a customized configuration file.
As an example of such configuration file (and the one flashed on the factory settings of the Smart Lights X4) with all the I/O:
  1substitutions:
  2  device_name: "smart-lights-x4"
  3  friendly_name: "Smart Lights X4"
  4  project_name: "smart.lights_x4"
  5  project_version: "1.0"
  6  ap_ssid: "Smart-Lights-X4"
  7  ap_pwd: "smartlights"
  8
  9esphome:
 10  name: "${device_name}"
 11  name_add_mac_suffix: true
 12  project:
 13    name: "${project_name}"
 14    version: "${project_version}"
 15
 16esp32:
 17  board: esp32dev
 18  framework:
 19    type: arduino
 20
 21# Enable logging
 22logger:
 23
 24# Enable Home Assistant API
 25api:
 26
 27# Enable Over The Air updates
 28ota:
 29
 30#Public location of this yaml file
 31dashboard_import:
 32  package_import_url: github://JGAguado/Smart_Lights/docs/source/files/configuration.yaml@X4
 33  import_full_config: false
 34
 35# Enable fallback hotspot (captive portal) in case wifi connection fails
 36captive_portal:
 37
 38esp32_improv:
 39  authorizer: none
 40
 41improv_serial:
 42
 43wifi:
 44  ap:
 45    ssid: "${ap_ssid}"
 46    password: "${ap_pwd}"
 47
 48
 49light:
 50  - platform: monochromatic
 51    name: "Light 1"
 52    id: light_1
 53    output: l1
 54  - platform: monochromatic
 55    name: "Light 2"
 56    id: light_2
 57    output: l2
 58  - platform: monochromatic
 59    name: "Light 3"
 60    id: light_3
 61    output: l3
 62  - platform: monochromatic
 63    name: "Light 4"
 64    id: light_4
 65    output: l4
 66
 67
 68output:
 69  - platform: ledc
 70    id: l1
 71    pin: GPIO23
 72  - platform: ledc
 73    id: l2
 74    pin: GPIO25
 75  - platform: ledc
 76    id: l3
 77    pin: GPIO26
 78  - platform: ledc
 79    id: l4
 80    pin: GPIO27
 81
 82binary_sensor:
 83  - platform: gpio
 84    name: "PB1"
 85    pin:
 86      number: GPIO32
 87    on_press:
 88      then:
 89        - light.toggle: light_1
 90  - platform: gpio
 91    name: "PB2"
 92    pin:
 93      number: GPIO33
 94    on_press:
 95      then:
 96        - light.toggle: light_2
 97  - platform: gpio
 98    name: "PB3"
 99    pin:
100      number: GPIO34
101    on_press:
102      then:
103        - light.toggle: light_3
104  - platform: gpio
105    name: "PB4"
106    pin:
107      number: GPIO35
108    on_press:
109      then:
110        - light.toggle: light_4
Arduino
If you are still interested in programming directly with the Arduino IDE, the procedure is no different than with any other ESP32 devices:
Open the Arduino IDE and go to File -> Preferences option.
Add to the Additional Boards Manager URSLs the url:
https://raw.githubusercontent.com/espressif/arduino-esp32/gh-pages/package_esp32_index.json
Close the preferences and open in the menu Tools -> Board -> Boards Manager.
Search for esp32 and install it. This might take some time.
Now you can select the board ESP32 Dev Module as the target board. Leave the rest of parameters by default.
Select the correct port and remember to enter the board into flashing mode before uploading the sketch.